


How to Use GitBook for Technical Documentation
This guide will share my experience creating technical documentation using GitBook and act as a de-facto quick-start guide to GitBook.


For the past three months, I have had the distinct pleasure of working as an Outreachy intern for an open-source project called Intermine, where I was tasked with creating new user training documentation. For this project, I entirely rewrote the Intermine user documentation—which included images, code snippets, tables, mathematical formulas, and more—using GitBook. This guide will share my experience creating technical documentation using GitBook and act as a de-facto quick-start guide to GitBook.
What Is GitBook?
GitBook is a collaborative documentation tool that allows anyone to document anything—such as products and APIs—and share knowledge through a user-friendly online platform. According to GitBook, “GitBook is a flexible platform for all kinds of content and collaboration.” It provides a single unified workspace for different users to create, manage and share content without using multiple tools. For example:
- Individuals can use GitBook to track their personal projects, add notes or ideas.
- Teams can centralize and share their internal knowledge bases on GitBook, improving collaboration and making finding information more convenient.
- Organizations, such as Arctype, can create beautiful docs to guide and support their users and contributors.
Why Is GitBook the Best Documentation Solution?
Given that digital documentation solutions have been around since the dawn of the digital age, it is entirely fair to ask, “why does the world need another documentation tool?”—or in other words, “why should anyone use GitBook?” Of course, other good solutions can be utilized to build user and developer documentation, such as ReadTheDocs, MKDocs, and Docsify. These popular tools share some features with GitBook, including supporting custom domains, PDF export, search, and navigation abilities. However, GitBook outperforms these documentation solutions in many aspects, including but not limited to:
- Superior customization capabilities to reflect any brand’s identity
- Great plugin system with almost 700 plugins that extend the default GitBook functionally
- The most convenient GitHub integration you’ll find to sync your documentation with GitHub and keep everything up-to-date easily!
Therefore, in a scenario where requirements like advanced branding, customizable UI design, and features extensibility are essential, existing alternatives cannot compete with GitBook.
As a more concrete example, Intermine had some specific requirements for my documentation overhaul project, which included search and customization abilities and markdown support. Similar to the scenario described above, I started comparing several options and ultimately chose Gitbook to create the new user training material because it:
- Comes standard with both a great online WYSIWYG editor and markdown support
- Allows for team collaboration
- Can be customized to match any organization’s branding
- Offers a base version that is entirely free for personal use, and the paid, premium version can also be licensed to open-source projects free of charge
- Can display your content, publicly or privately, with anyone—including non-GitBook users.
- It can be configured to synchronize your content with GitHub and also create PDF versions of your documentation.
- It supports integration with other tools, such as Slack, Intercom, and Google Analytics.
Disclaimer: The above list is not comprehensive nor complete.
The Three Fundamentals of GitBook
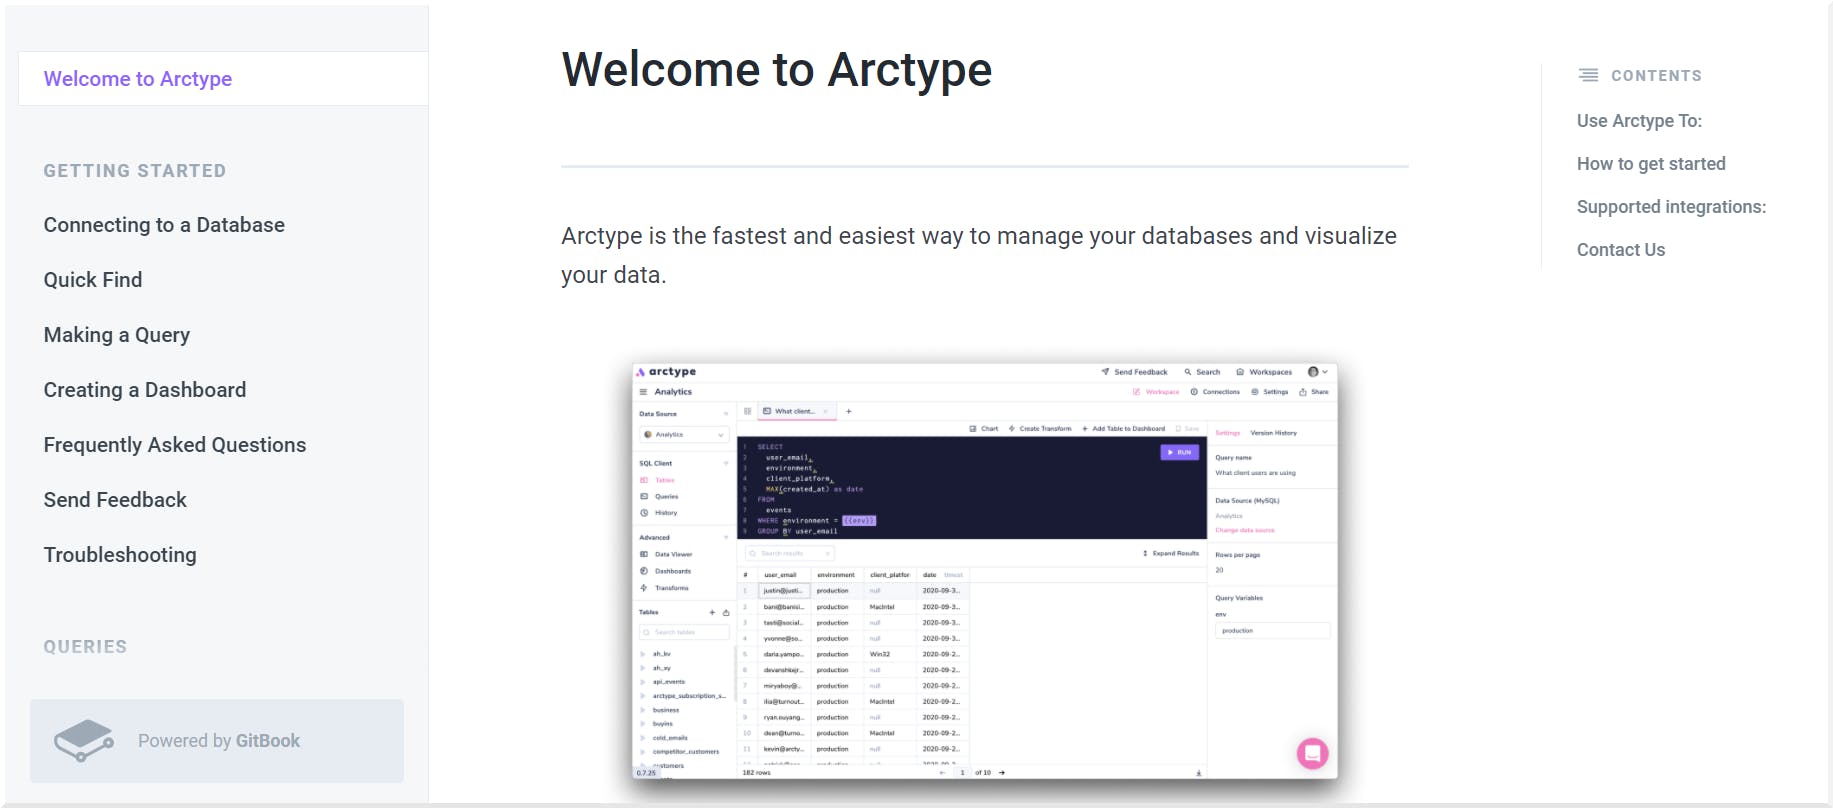
According to the GitBook documentation, there are some fundamentals that you’ll need to know to start with GitBook. I will demonstrate these basics using the Arctype documentation written in GitBook.
- Space: in GitBook, spaces are projects – public or private - where you can start writing your personal notes, documenting a product, or sharing knowledge-base simultaneously with your team or individually.
- Organization: an organization is a place where one or several projects are stored. If your organization works on many different projects, you can create a space for each one, and you can invite members to join your organization and start collaborating!
- GitHub Integration: you can easily synchronize your work on GitBook with any GitHub repository, which keeps your documentation up-to-date.
A Step by Step Guide to Creating Your First Documentation on GitBook
Now that we understand the underlying fundamentals of GitBook, we're ready to start creating documentation!
Signing Up and Creating Your First Project
First, you need to sign up for GitBook using your email, GitHub, or Gmail account. As you can see in the screenshot below, you will first be prompted to create a new space dedicated to your projects that you can share publicly or with your team. You can also create an organization that might include several projects or spaces.
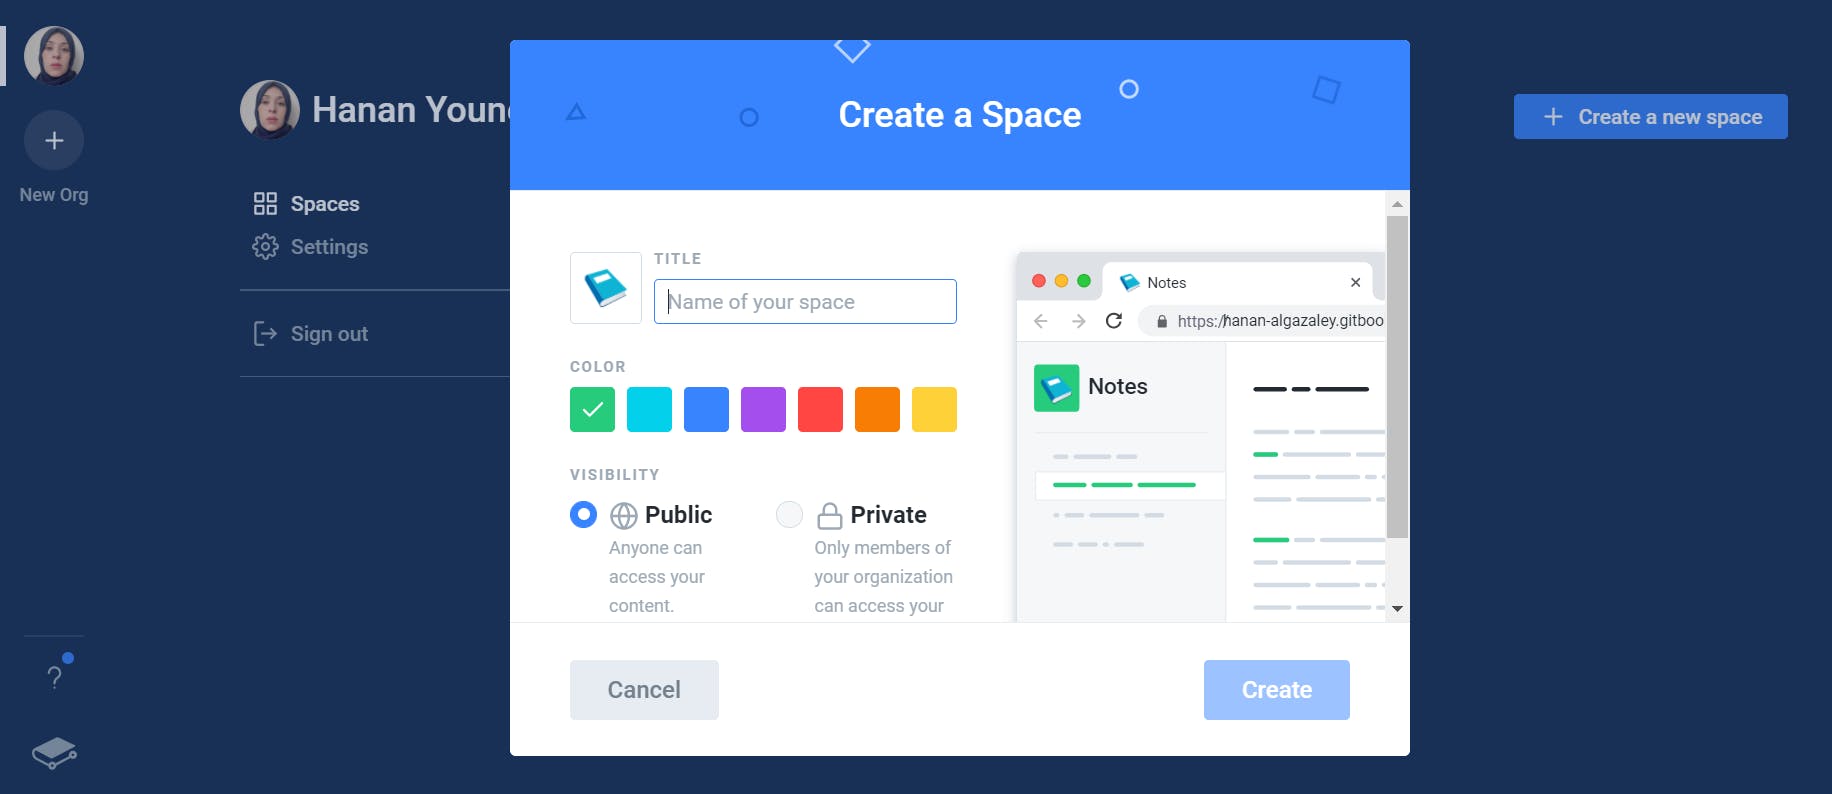
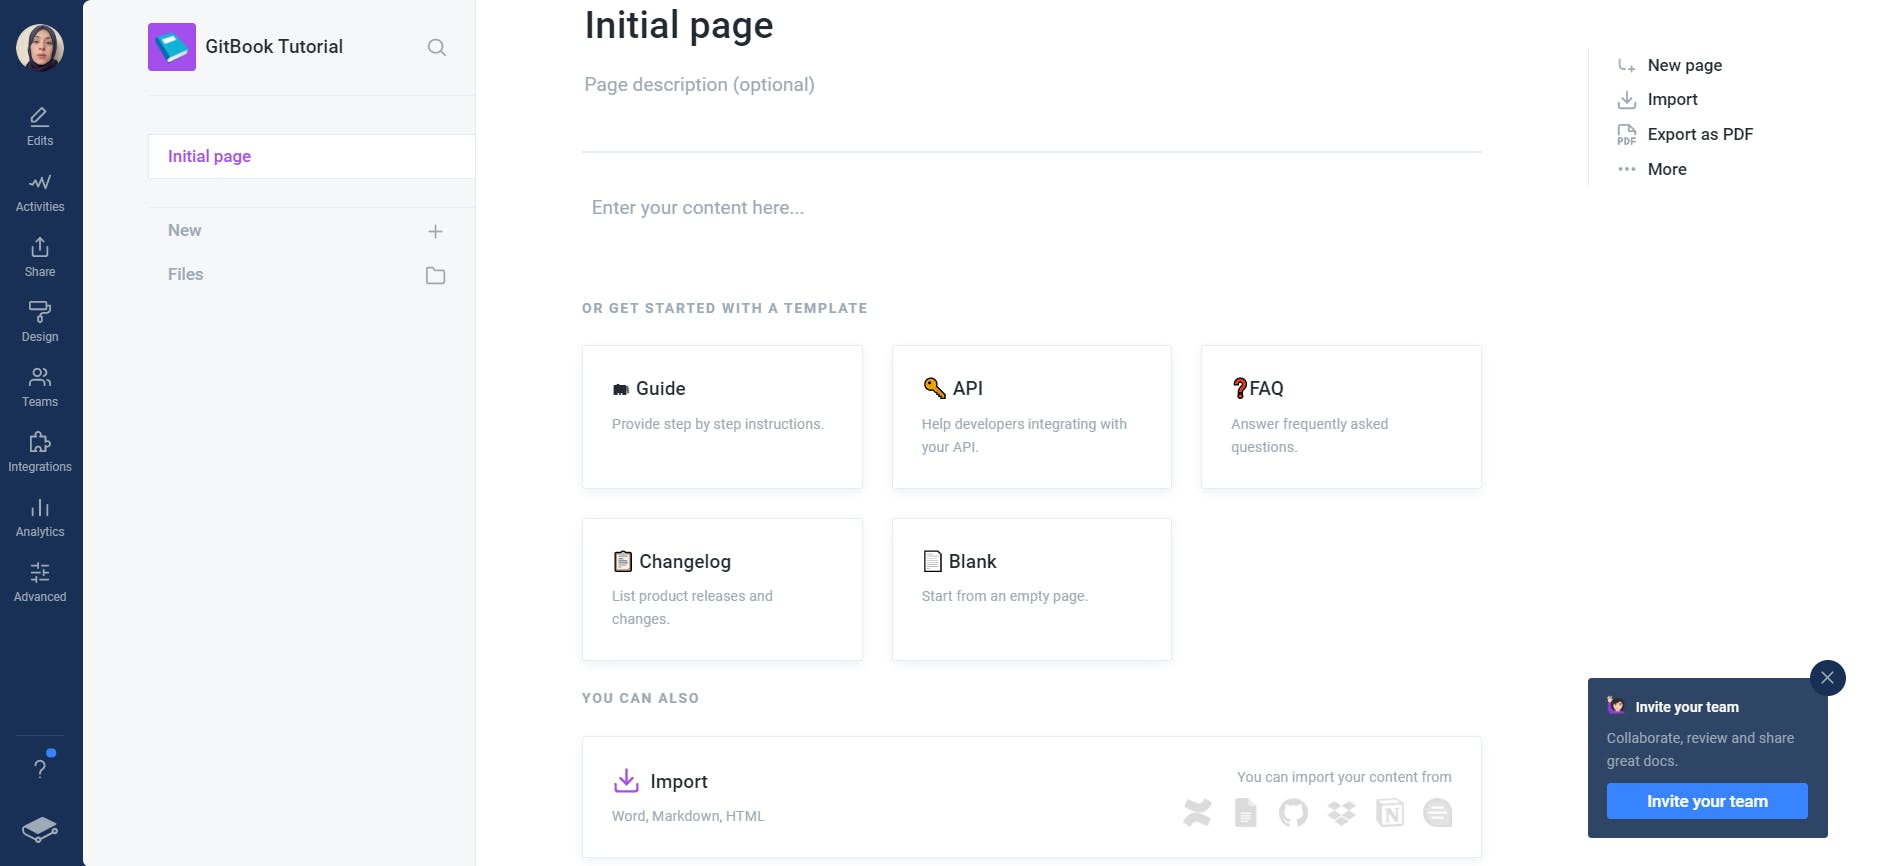
I will keep things simple, and you’ll only need to create a new space to follow along. I created a public space, GitBook Tutorial, shown in the following screenshots. The initial page of your new space should look something like this:
Creating and Linking to a GitHub Repository
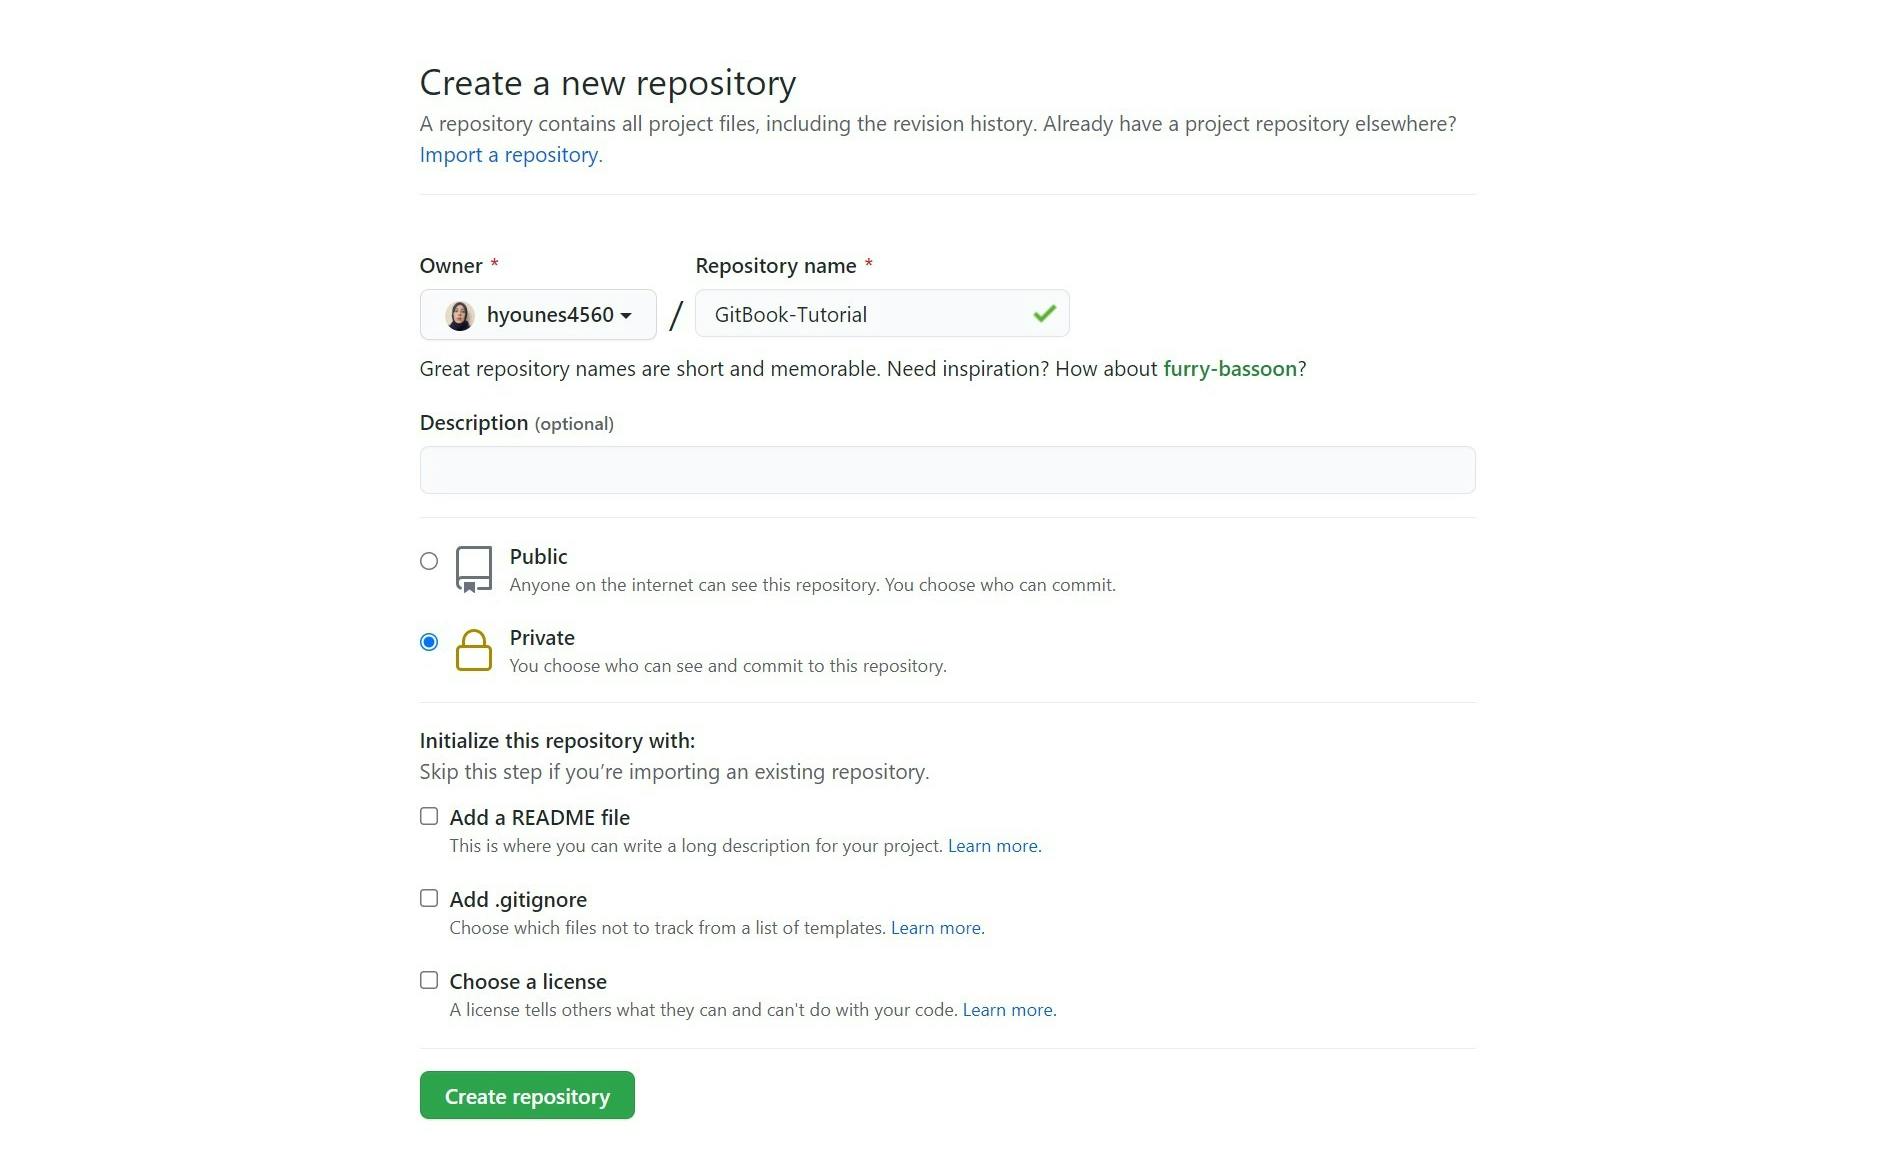
As previously mentioned, you can integrate your GitBook content with a GitHub repository. So, you will have to create a repository in GitHub – public or private - to link with your new GitBook space or use a pre-existing one. I’ve created a new private repository for the sake of this guide.
Remember to not edit the new repository on GitHub for now.
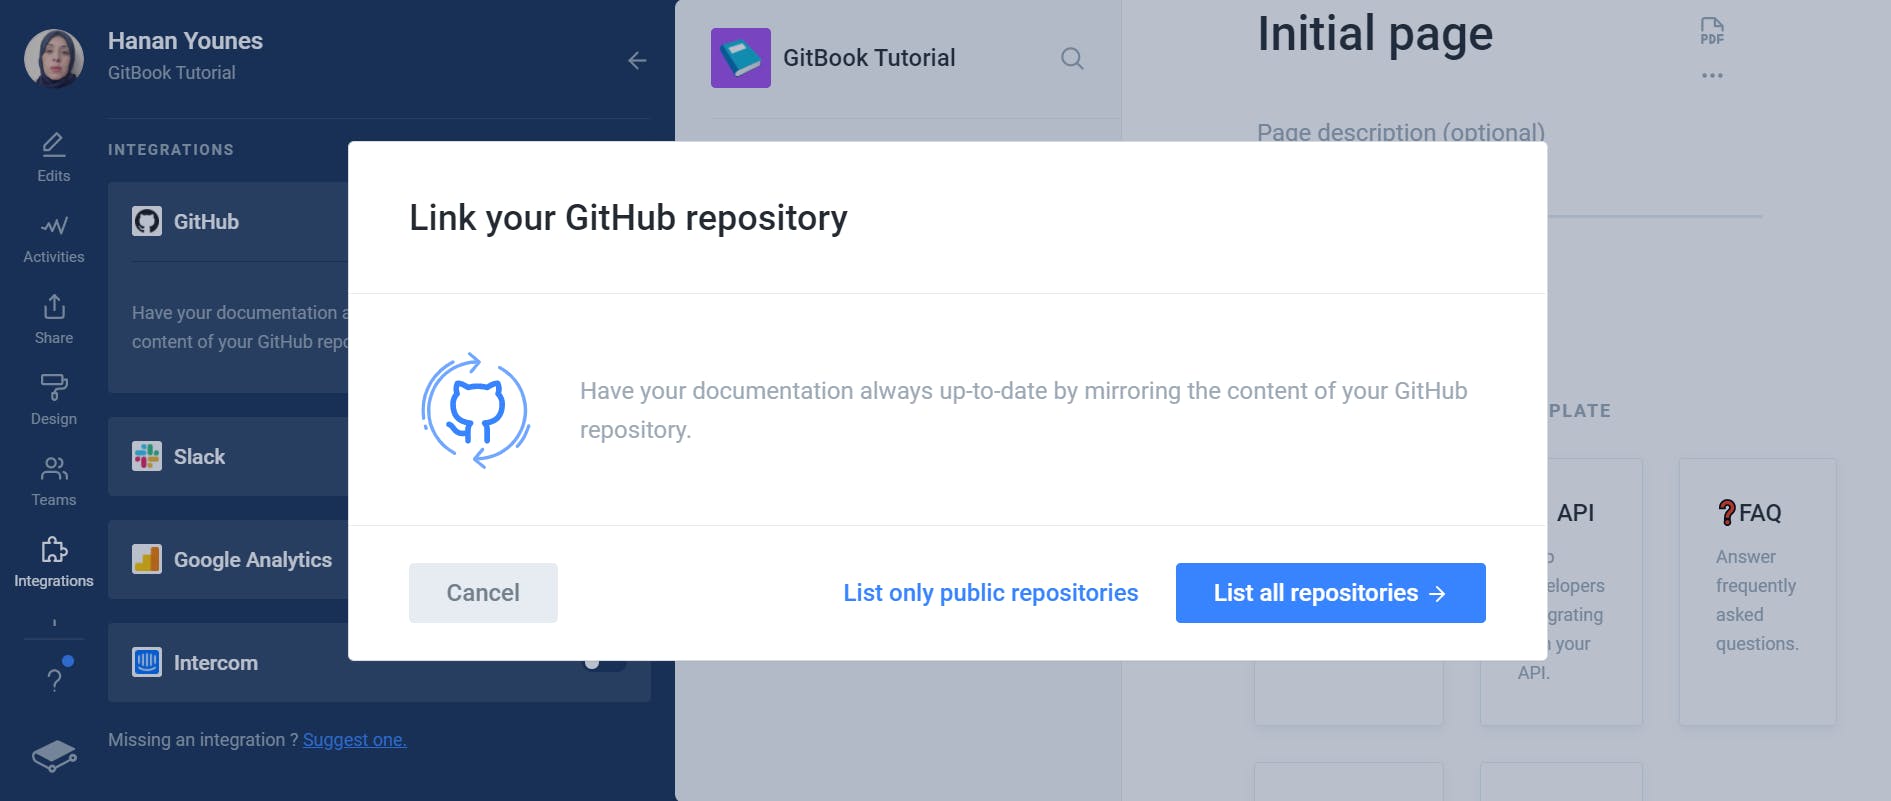
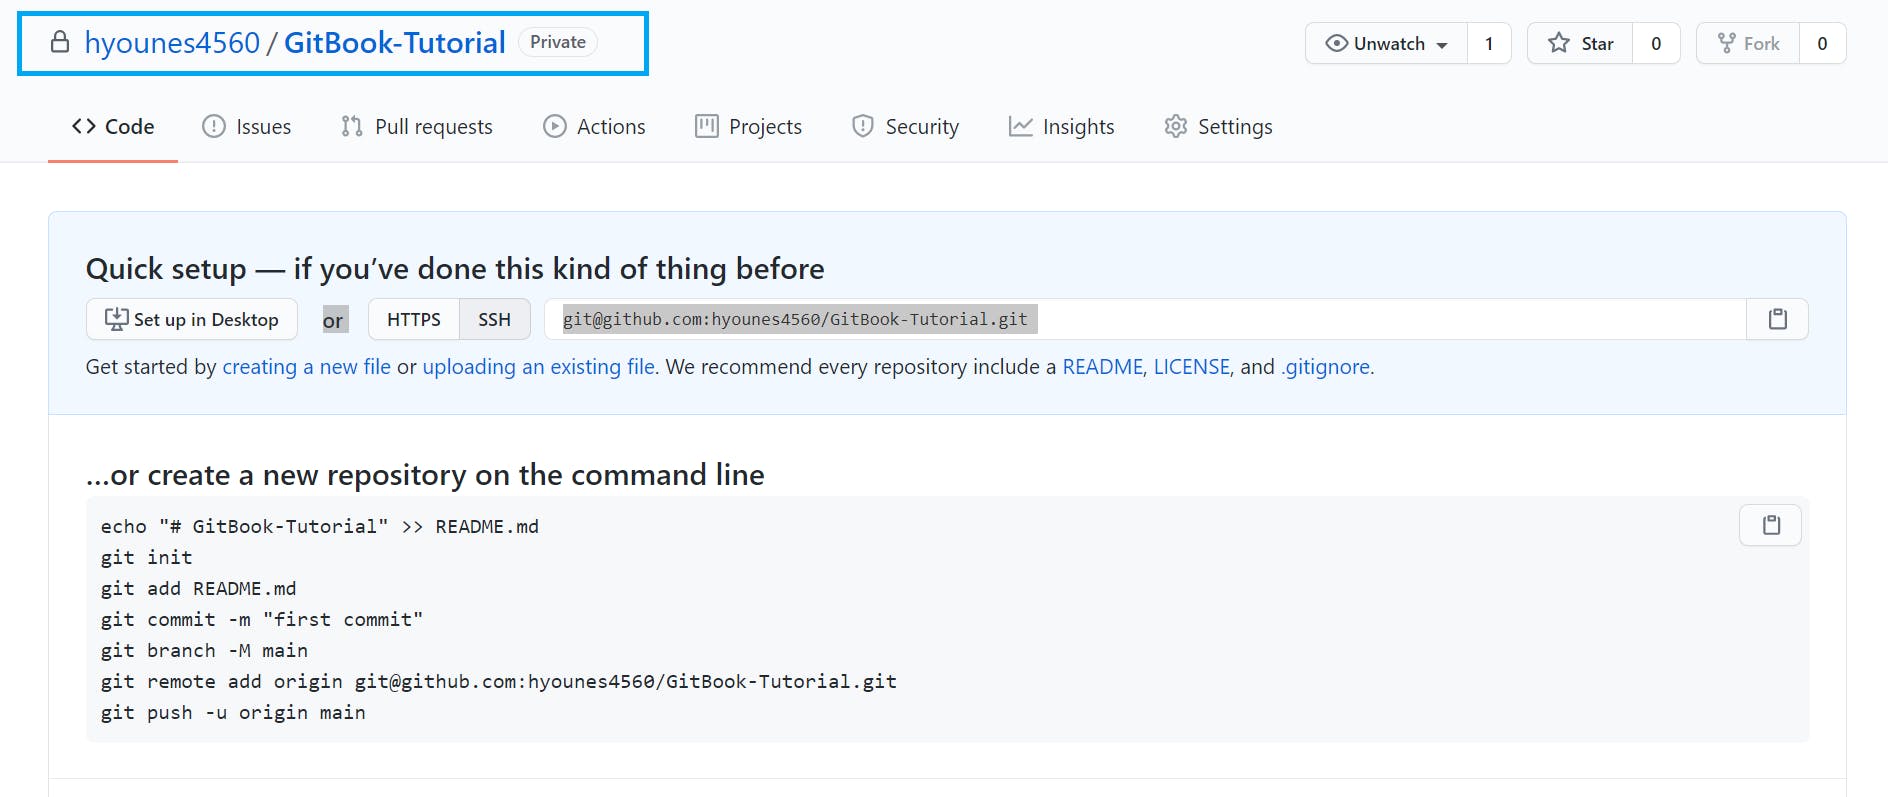 To set up the GitHub integration, click on the Integrations tab from the left sidebar and then select the GitHub checkbox, which will allow GitBook to access your GitHub account. Now, you must choose the repository that you want to link. Since my repository is private, I clicked the List all repositories option and chose the newly created repo. Note, if your repository is public, select List only public repositories instead.
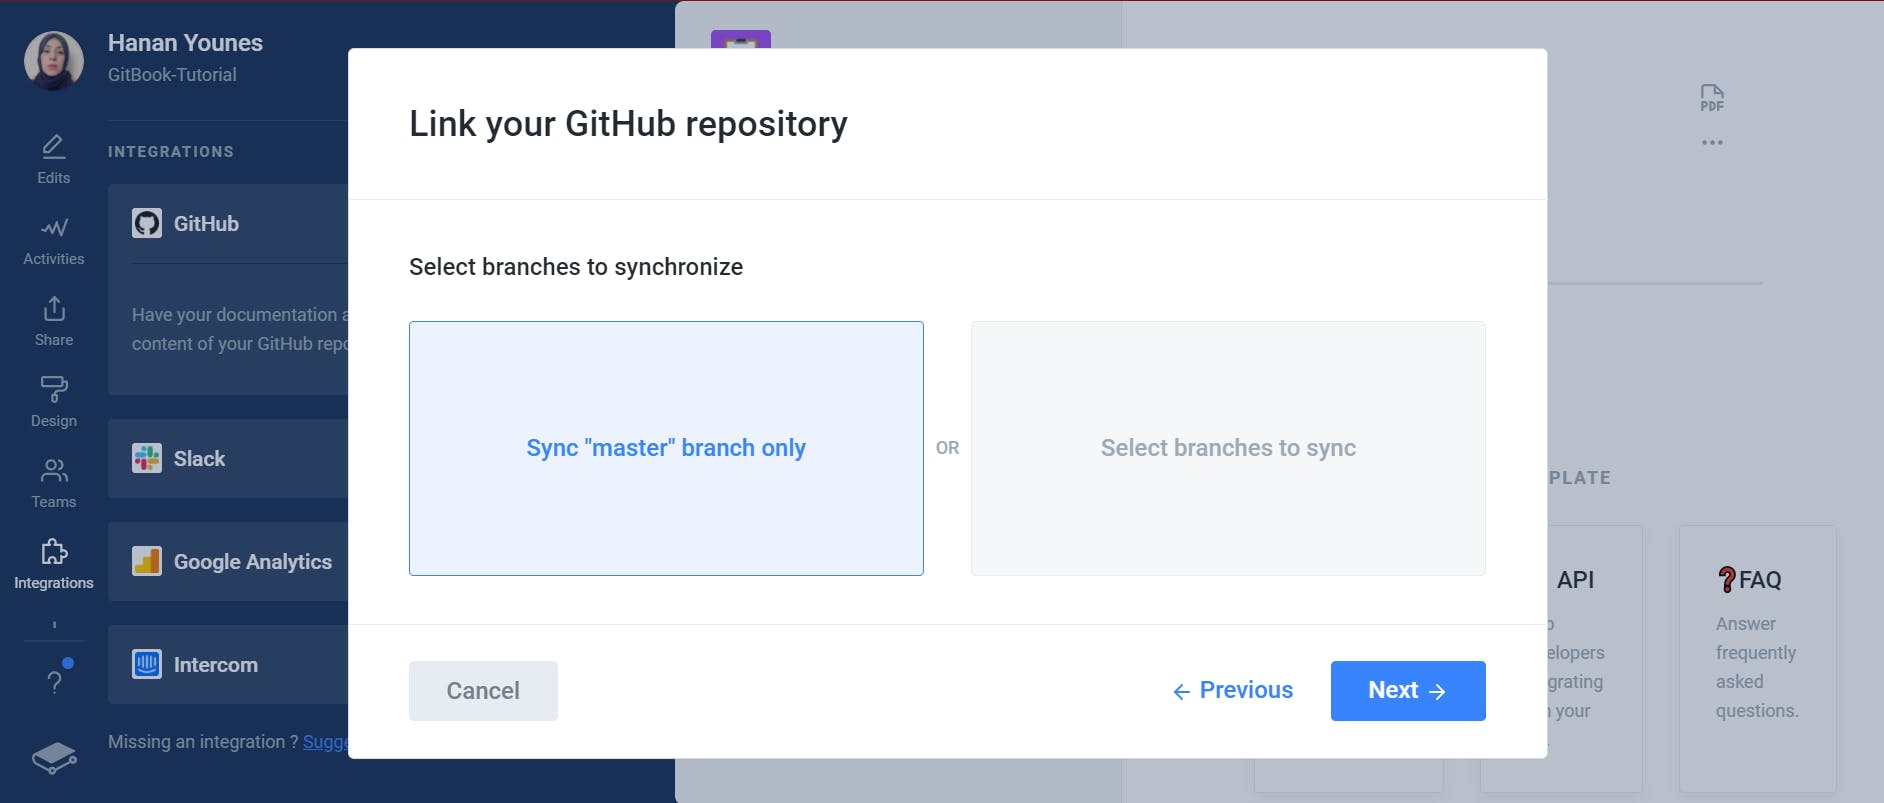
During the setup, you will be asked to select branches to synchronize. GitBook imports the master branch by default; however, you can specify other branches.
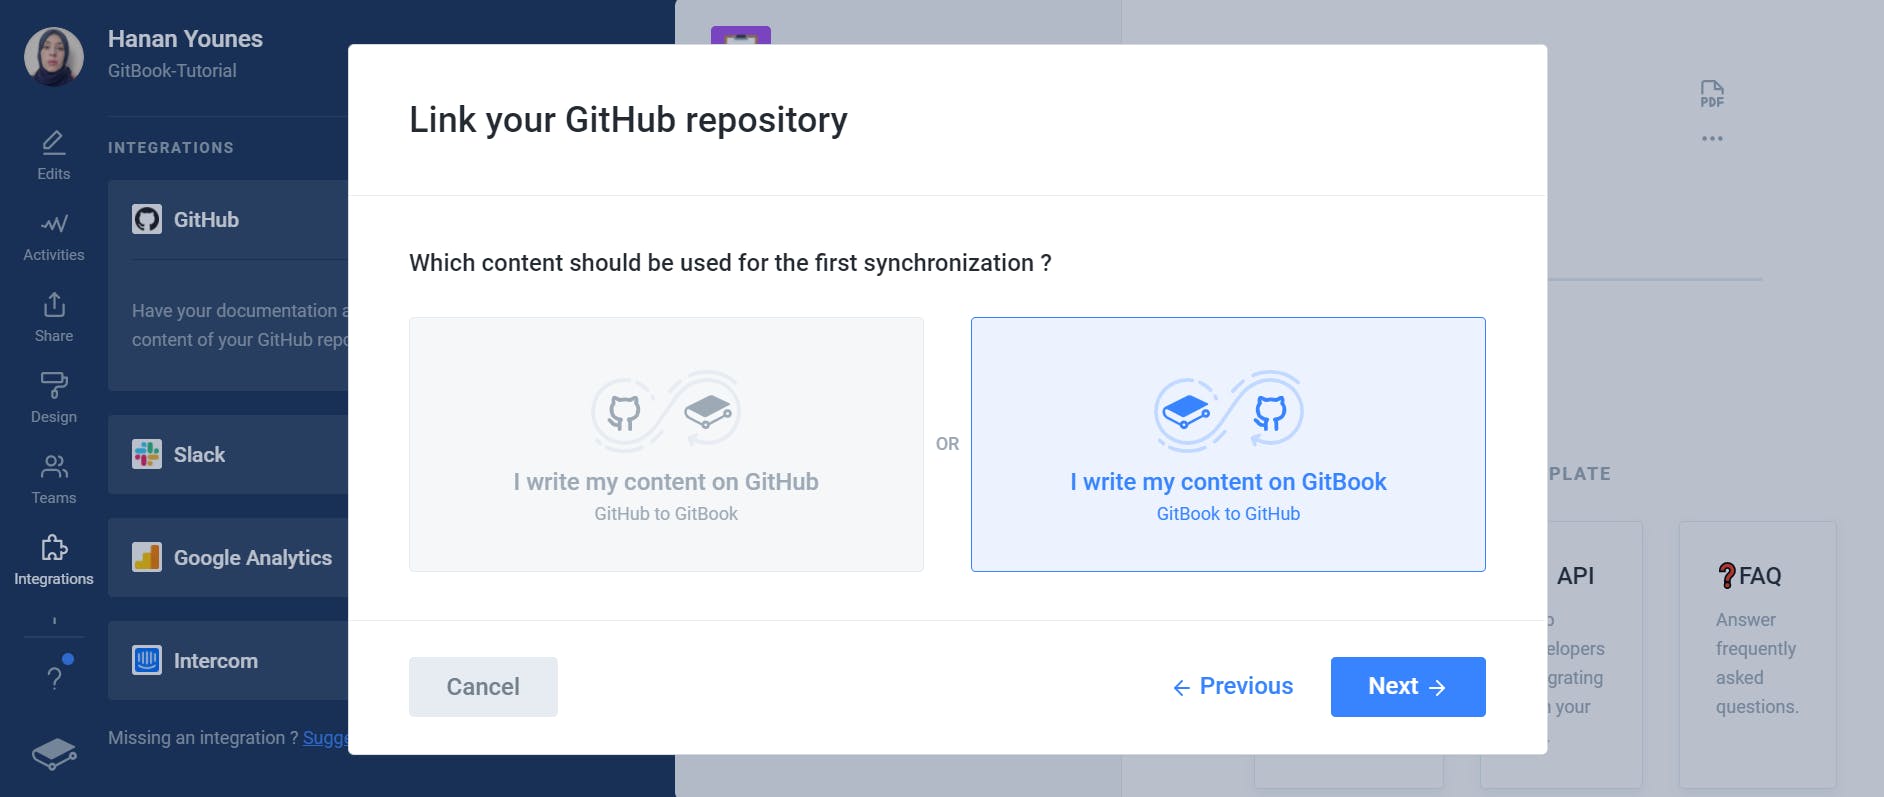
Next, you will be promoted to choose the content to be used for the first synchronization. Since our new GitHub repository is empty, we'll select the I write my content on GitBook option, and GitBook will add the content of the new space to GitHub.
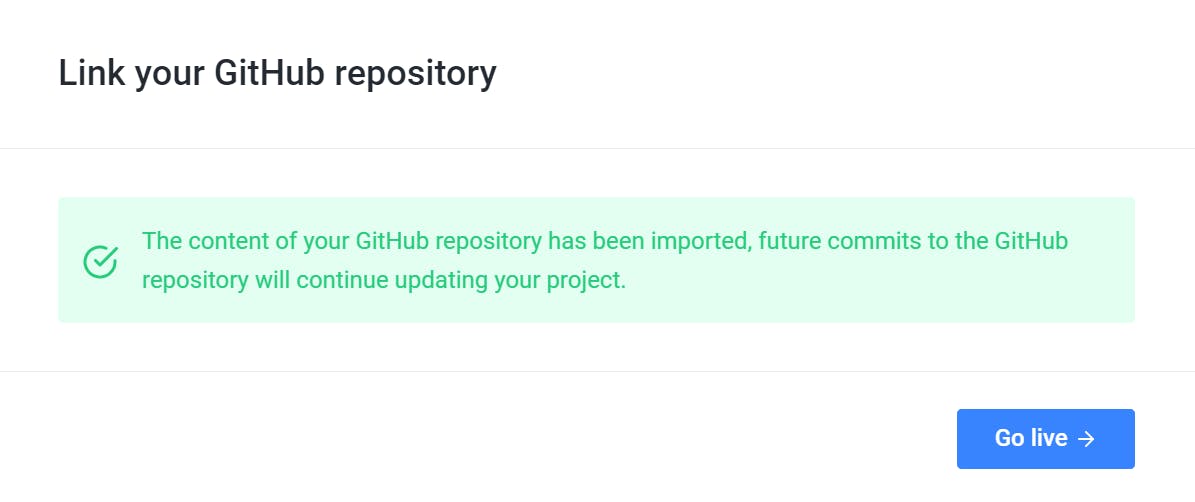
Once you’re successfully done the linking process between GitHub and GitBook, you should see the following:
Please note that you can only make changes to your GitBook space or GitHub repository, not to both simultaneously.
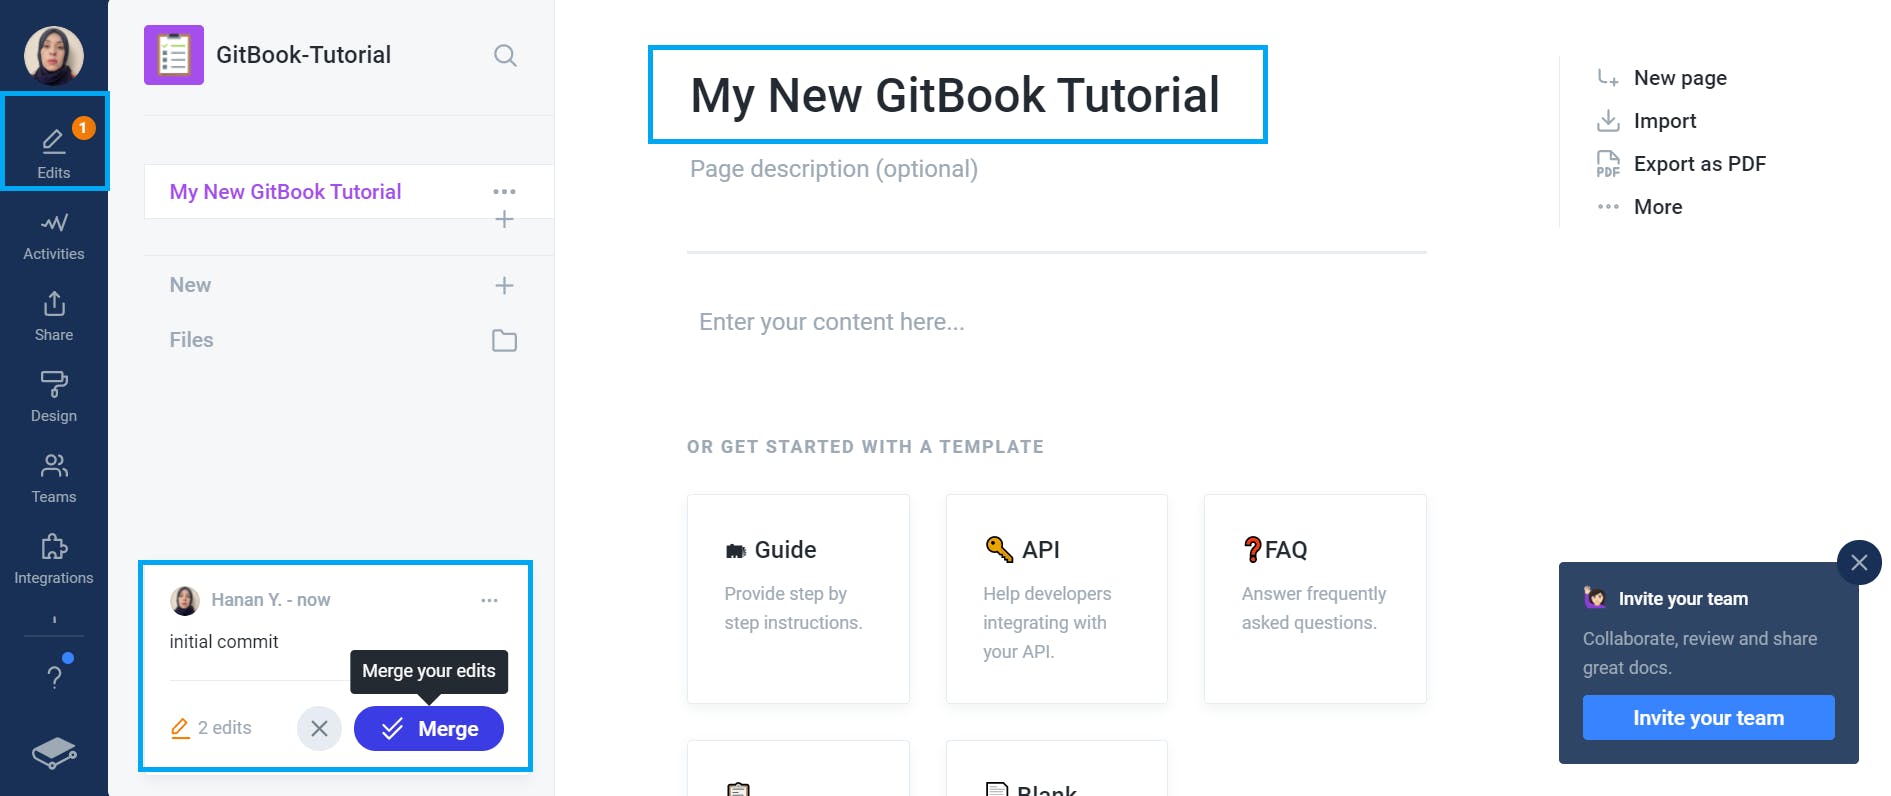
Merging Changes to Your GitBook Pages
Now, you can add some changes (new draft) on GitBook and merge them to your GitHub repo. GitBook doesn’t automatically save your edits; so, you need to use “Save” to save your draft and “Merge” to commit your changes to your GitHub repository. Remember to add a brief description to every change/draft you make as shown below.
Once merged, you can verify the new changes on your linked GitHub repository.

Viewing and Sharing Your Documentation
You can now share your documentation with others using the Shareable Link.
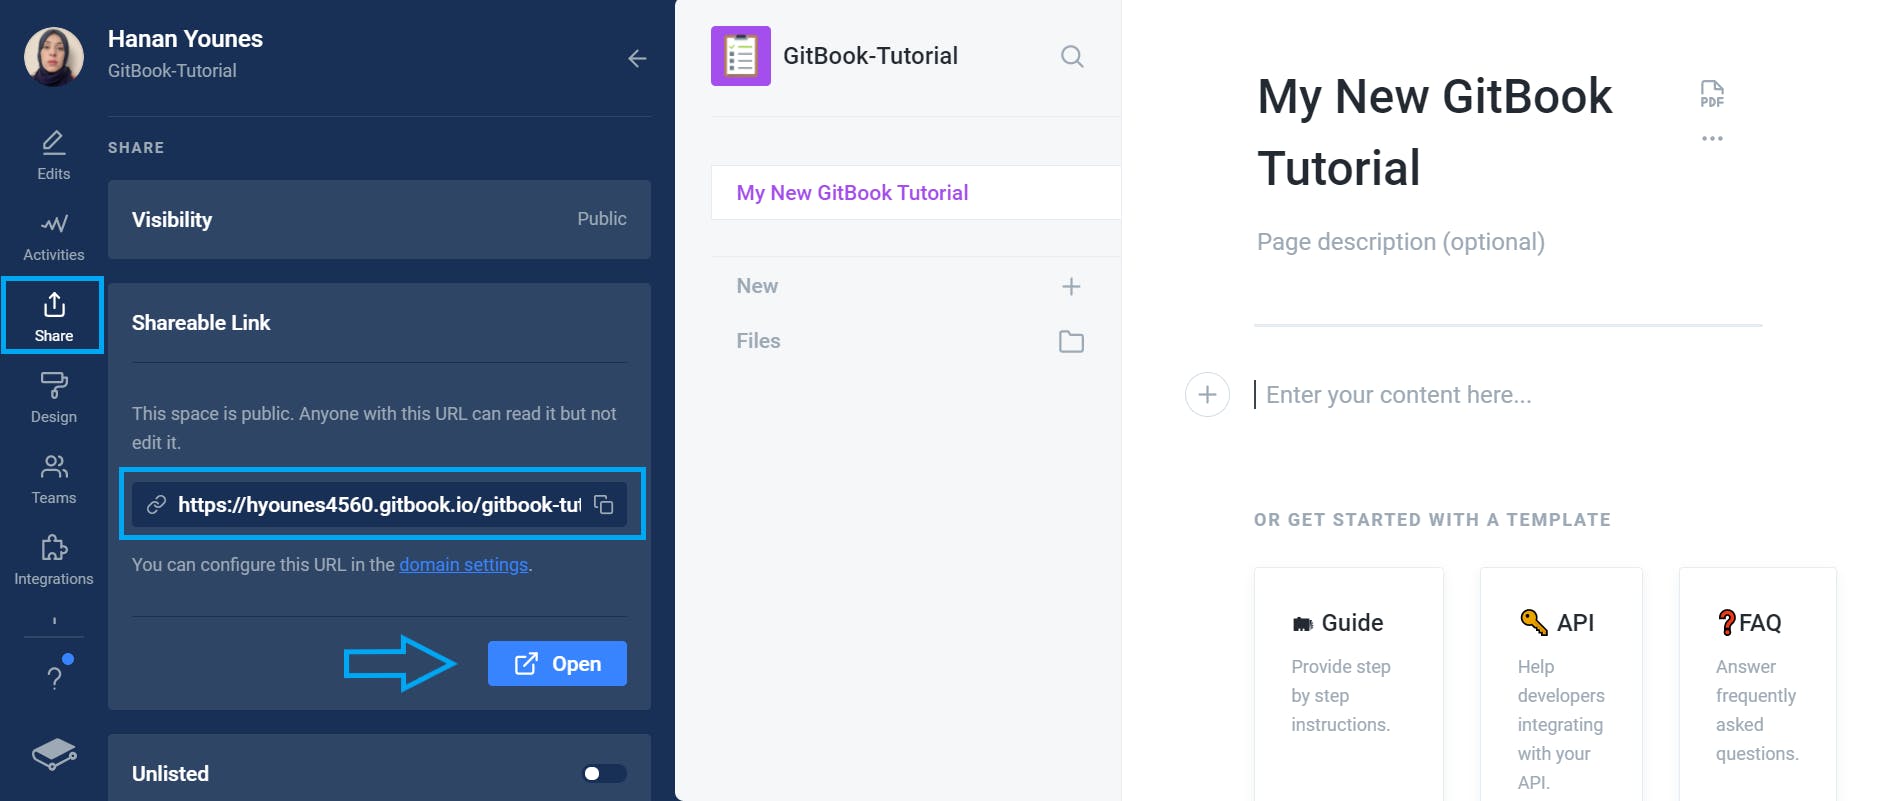
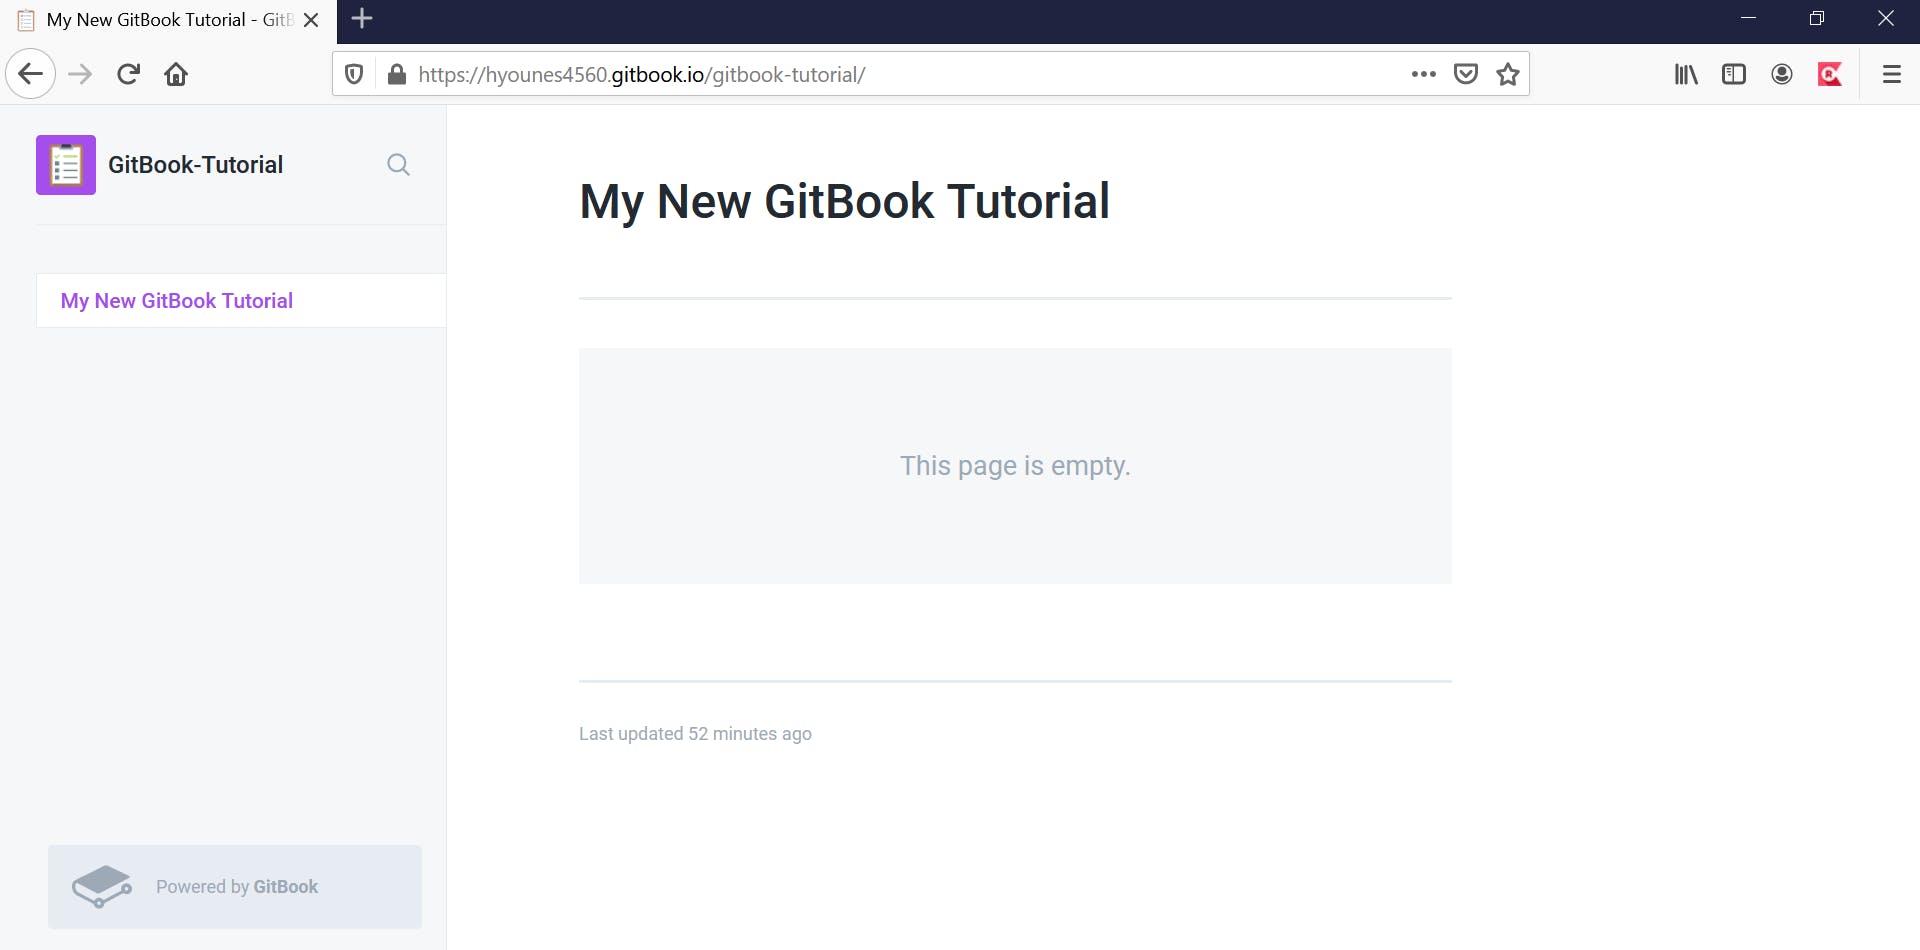
You can also preview your work on the web by clicking the Open button.
I hope this guide helped you understand how to use GitBook for documenting your work—please leave a comment to let me know about your experience!